
Docker部署WordPress,并开启SSL
本文使用的是阿里云ECS,操作系统为Rocky Linux release 8.5 (Green Obsidian)
转载自:https://tls.su/2022/04/14/tomato/
[root@blog ~]# cat /etc/redhat-release
Rocky Linux release 8.5 (Green Obsidian)
-
Docker安装
- 卸载老版本
yum remove docker \ docker-client \ docker-client-latest \ docker-common \ docker-latest \ docker-latest-logrotate \ docker-logrotate \ docker-engine- 安装docker 基础包
yum install -y yum-utils \ device-mapper-persistent-data \ lvm2- 设置稳定仓库
yum-config-manager \
    --add-repo \
    https://mirrors.aliyun.com/docker-ce/linux/centos/docker-ce.repo
结果如下:
Adding repo from: https://mirrors.aliyun.com/docker-ce/linux/centos/docker-ce.repo查看一下,多了一个docker-ce.repo
[root@blog ~]# ll /etc/yum.repos.d/ total 56 -rw-r--r-- 1 root root 2081 May 5 11:13 docker-ce.repo -rw-r--r-- 1 root root 718 Mar 22 14:07 Rocky-AppStream.repo -rw-r--r-- 1 root root 703 Mar 22 14:07 Rocky-BaseOS.repo -rw-r--r-- 1 root root 1793 Mar 22 14:07 Rocky-Debuginfo.repo -rw-r--r-- 1 root root 368 Mar 22 14:07 Rocky-Devel.repo -rw-r--r-- 1 root root 703 Mar 22 14:07 Rocky-Extras.repo -rw-r--r-- 1 root root 739 Mar 22 14:07 Rocky-HighAvailability.repo -rw-r--r-- 1 root root 680 Mar 22 14:07 Rocky-Media.repo -rw-r--r-- 1 root root 688 Mar 22 14:07 Rocky-NFV.repo -rw-r--r-- 1 root root 698 Mar 22 14:07 Rocky-Plus.repo -rw-r--r-- 1 root root 723 Mar 22 14:07 Rocky-PowerTools.repo -rw-r--r-- 1 root root 754 Mar 22 14:07 Rocky-ResilientStorage.repo -rw-r--r-- 1 root root 689 Mar 22 14:07 Rocky-RT.repo -rw-r--r-- 1 root root 2391 Mar 22 14:07 Rocky-Sources.repo- 安装Docker Engine – Community,安装最新版本(latest)
yum install docker-ce docker-ce-cli containerd.io -y结果如下
Docker CE Stable - x86_64 65 kB/s | 23 kB 00:00 Dependencies resolved. ====================================================================================== Package Arch Version Repository Size ====================================================================================== Installing: containerd.io x86_64 1.5.11-3.1.el8 docker-ce-stable 29 M docker-ce x86_64 3:20.10.14-3.el8 docker-ce-stable 22 M docker-ce-cli x86_64 1:20.10.14-3.el8 docker-ce-stable 30 M Installing dependencies: container-selinux noarch 2:2.173.0-1.module+el8.5.0+735+2f243138 appstream 56 k docker-ce-rootless-extras x86_64 20.10.14-3.el8 docker-ce-stable 4.6 M docker-scan-plugin x86_64 0.17.0-3.el8 docker-ce-stable 3.8 M fuse-common x86_64 3.2.1-12.el8 baseos 20 k fuse-overlayfs x86_64 1.8-1.module+el8.5.0+735+2f243138 appstream 72 k fuse3 x86_64 3.2.1-12.el8 baseos 49 k fuse3-libs x86_64 3.2.1-12.el8 baseos 93 k libcgroup x86_64 0.41-19.el8 baseos 69 k libslirp x86_64 4.4.0-1.module+el8.5.0+710+4c471e88 appstream 69 k slirp4netns x86_64 1.1.8-1.module+el8.5.0+710+4c471e88 appstream 50 k Enabling module streams: container-tools rhel8 Transaction Summary ====================================================================================== Install 13 Packages Total download size: 90 M Installed size: 374 M Downloading Packages: (1/13): libslirp-4.4.0-1.module+el8.5.0+710+4c471e88. 675 kB/s | 69 kB 00:00 (2/13): fuse-overlayfs-1.8-1.module+el8.5.0+735+2f243 616 kB/s | 72 kB 00:00 (3/13): container-selinux-2.173.0-1.module+el8.5.0+73 279 kB/s | 56 kB 00:00 (4/13): slirp4netns-1.1.8-1.module+el8.5.0+710+4c471e 500 kB/s | 50 kB 00:00 (5/13): fuse-common-3.2.1-12.el8.x86_64.rpm 220 kB/s | 20 kB 00:00 (6/13): libcgroup-0.41-19.el8.x86_64.rpm 701 kB/s | 69 kB 00:00 (7/13): fuse3-libs-3.2.1-12.el8.x86_64.rpm 836 kB/s | 93 kB 00:00 (8/13): fuse3-3.2.1-12.el8.x86_64.rpm 291 kB/s | 49 kB 00:00 (9/13): docker-ce-20.10.14-3.el8.x86_64.rpm 866 kB/s | 22 MB 00:25 (10/13): docker-ce-rootless-extras-20.10.14-3.el8.x86 898 kB/s | 4.6 MB 00:05 (11/13): containerd.io-1.5.11-3.1.el8.x86_64.rpm 881 kB/s | 29 MB 00:33 (12/13): docker-scan-plugin-0.17.0-3.el8.x86_64.rpm 913 kB/s | 3.8 MB 00:04 (13/13): docker-ce-cli-20.10.14-3.el8.x86_64.rpm 884 kB/s | 30 MB 00:35 -------------------------------------------------------------------------------------- Total 2.5 MB/s | 90 MB 00:35 Docker CE Stable - x86_64 11 kB/s | 1.6 kB 00:00 Importing GPG key 0x621E9F35: Userid : "Docker Release (CE rpm)检查一下
[root@blog ~]# docker --version Docker version 20.10.14, build a224086- 重新启动,添加开机自动启动
systemctl restart docker.service
systemctl enable docker.service
结果如下:
[root@blog ~]# systemctl restart docker.service
[root@blog ~]# systemctl enable docker.service
Created symlink /etc/systemd/system/multi-user.target.wants/docker.service → /usr/lib/systemd/system/docker.service.
至此,docker安装完成。
-
拉镜像
需要MySQL、WordPress、nginx-proxy-manager这三个镜像
MySQL可以用Mariadb替代- mysql
docker pull mysql结果如下:
Using default tag: latest latest: Pulling from library/mysql 4be315f6562f: Pull complete 96e2eb237a1b: Pull complete 8aa3ac85066b: Pull complete ac7e524f6c89: Pull complete f6a88631064f: Pull complete 15bb3ec3ff50: Pull complete ae65dc337dcb: Pull complete 573c3c7fa18d: Pull complete 9d10771b98b8: Pull complete 3d8ef442614b: Pull complete 7dc17a6cea26: Pull complete 752752efdaea: Pull complete Digest: sha256:2dafe3f044f140ec6c07716d34f0b317b98f8e251435abd347951699f7aa3904 Status: Downloaded newer image for mysql:latest docker.io/library/mysql:latest- wordpress
docker pull wordpress结果如下:
Using default tag: latest latest: Pulling from library/wordpress 1fe172e4850f: Pull complete 012a3732d045: Pull complete 43092314d50d: Pull complete 4f615e42d863: Pull complete cd39010a4efc: Pull complete d983c9ce24de: Pull complete ecbdd59ae430: Pull complete 9d02b88c8618: Pull complete 50a246031d43: Pull complete a6c0267e6c34: Pull complete 787ca6348cef: Pull complete da8ad43595e2: Pull complete e191f9e80e29: Pull complete fed8d3fd90f9: Pull complete 9ffdaa9000ed: Pull complete 5774aeca6412: Pull complete 6978431bb9e2: Pull complete fb4d3fb05351: Pull complete 23d3af42839e: Pull complete a5b33728e4a6: Pull complete 766e2b674cd0: Pull complete Digest: sha256:abc1a527c810542eea7cd0be5c5e8a1d087f16c363a46178ea615e8083700077 Status: Downloaded newer image for wordpress:latest docker.io/library/wordpress:latest- 拉取NginxProxyManager镜像
docker pull jc21/nginx-proxy-manager结果如下:
Using default tag: latest latest: Pulling from jc21/nginx-proxy-manager f003217c5aae: Pull complete ce6a15c1ccfb: Pull complete b7091728beb7: Pull complete 69285662a50c: Pull complete 8ffff58f8338: Pull complete 73a8411ba8dd: Pull complete 08a1d8a12d96: Pull complete 3ad728d3ce37: Pull complete d9e02947749c: Pull complete 931463fbf405: Pull complete 7d503d40153f: Pull complete 394a1d63eb7f: Pull complete 5a4a5e0c048d: Pull complete 91e518c080f5: Pull complete 35b505fd05ae: Pull complete e437ebdbef5e: Pull complete 4ebb9a781e17: Pull complete 9b74d3e6e27c: Pull complete 951bcdacd23b: Pull complete 5a4d1a237ee2: Pull complete cb7801726057: Pull complete 7bae92abae1b: Pull complete 6f37ef64ee9a: Pull complete e2f180ea66f2: Pull complete 89345f53ec6b: Pull complete 8d63e39cb592: Pull complete 0d7b6a837653: Pull complete 4f4fb700ef54: Pull complete d35b2b35de09: Pull complete 5742969b17ba: Pull complete aaa30b575f38: Pull complete 9e13525ebc22: Pull complete Digest: sha256:8129baefcdd460c8baaf0b597028760a3adb6c7592bab0ae4e0a9b88384125e3 Status: Downloaded newer image for jc21/nginx-proxy-manager:latest docker.io/jc21/nginx-proxy-manager:latest- 查看一下所拉取的镜像
docker image ls结果如下:
[root@blog ~]# docker image ls REPOSITORY TAG IMAGE ID CREATED SIZE mysql latest 96d0eae5ed60 7 days ago 524MB wordpress latest b44d413c437a 13 days ago 606MB jc21/nginx-proxy-manager latest 7c775dbb91f2 4 weeks ago 921MB -
创建虚拟网络blog
docker network create blog结果如下:
[root@blog ~]# docker network create blog a491bf17bfbaffc1879d2944f57f03cd83b4055407a818b5fc5a9303c5a708da -
运行mysql镜像
首先启动MySQL容器 并加入到blog这个网络
自定义密码MYSQL_ROOT_PASSWORD设置为999.gd.cndocker run --name mysql --net blog -e MYSQL_ROOT_PASSWORD=999.gd.cn -d mysql --character-set-server=utf8 --collation-server=utf8_unicode_ci结果如下:
[root@blog ~]# docker run --name mysql --net blog -e MYSQL_ROOT_PASSWORD=999.gd.cn -d mysql --character-set-server=utf8 --collation-server=utf8_unicode_ci
bd89482e0c69c9df199843f3d0394128215cc99270016030d73778aab7675266
进入数据库,配置数据库及用户权限。
- 进入mysql容器内部
docker exec -it mysql bash- 登录数据库
mysql -u root -p此时输入密码:999.gd.cn
- 创建数据库,注意后面按上分号,下同
create database wordpress;- 创建用户wordpress_user并设置密码为999.gd.cn,
'%'时表示为任意IP。
create user 'wordpress_user'@'%' identified by '999.gd.cn';- 为用户授权
grant all privileges on wordpress.* to 'wordpress_user'@'%' with grant option;- 刷新权限
flush privileges;- 退出mysql
exit- 退出容器
exit结果如下:
[root@blog ~]# docker exec -it mysql bash root@bd89482e0c69:/# mysql -u root -p Enter password: Welcome to the MySQL monitor. Commands end with ; or \g. Your MySQL connection id is 8 Server version: 8.0.29 MySQL Community Server - GPL Copyright (c) 2000, 2022, Oracle and/or its affiliates. Oracle is a registered trademark of Oracle Corporation and/or its affiliates. Other names may be trademarks of their respective owners. Type 'help;' or '\h' for help. Type '\c' to clear the current input statement. mysql> create database wordpress; Query OK, 1 row affected (0.01 sec) mysql> create user 'wordpress_user'@'%' identified by '999.gd.cn'; Query OK, 0 rows affected (0.01 sec) mysql> grant all privileges on wordpress.* to 'wordpress_user'@'%' with grant option; Query OK, 0 rows affected (0.00 sec) mysql> flush privileges; Query OK, 0 rows affected (0.00 sec) mysql> exit Bye root@bd89482e0c69:/# exit exit -
运行wordpress镜像
创建一个目录用于存放wordpress文件
cd /
mkdir wordpress
cd wordpress
运行wordpress镜像
docker run -dit --net blog -vpwd:/var/www/html --name wordpress wordpress结果如下:
[root@blog ~]# cd / [root@blog /]# mkdir wordpress [root@blog /]# cd wordpress/ [root@blog wordpress]# docker run -dit --net blog -vpwd:/var/www/html --name wordpress wordpress fae7cd77cb7438cad42eebb94efeb84c32bdfb285b4aad747e1ddf688d7be872 -
运行NginxProxyManager镜像
创建一个目录用于存放NiginxProxyManager配置文件
cd /
mkdir nginx_proxy
cd nginx_proxy
运行nginx-proxy-manager镜像,管理页面端口映射为45678,可以自定义
docker run -dit -p 80:80 -p 45678:81 -p 443:443 --net blog --name nginx_proxy -v $PWD/data:/data -v $PWD/letsencrypt:/etc/letsencrypt --restart=unless-stopped jc21/nginx-proxy-manager结果如下:
[root@blog wordpress]# cd / [root@blog /]# mkdir nginx_proxy [root@blog /]# cd nginx_proxy/ [root@blog nginx_proxy]# $PWD -bash: /nginx_proxy: Is a directory [root@blog nginx_proxy]# docker run -dit -p 80:80 -p 45678:81 -p 443:443 --net blog --name nginx_proxy -v $PWD/data:/data -v $PWD/letsencrypt:/etc/letsencrypt --restart=unless-stopped jc21/nginx-proxy-manager 1f0eabe99e768f0c115b4befec6a735497f811f8ef1c61465e517082aa42f0b9 -
需要的镜像就启动完成了,检查一下
docker ps结果如下:
[root@blog nginx_proxy]# docker ps
CONTAINER ID   IMAGE                      COMMAND                  CREATED              STATUS              PORTS                                                                                                               NAMES
1f0eabe99e76   jc21/nginx-proxy-manager   "/init"                  About a minute ago   Up About a minute   0.0.0.0:80->80/tcp, :::80->80/tcp, 0.0.0.0:443->443/tcp, :::443->443/tcp, 0.0.0.0:45678->81/tcp, :::45678->81/tcp   nginx_proxy
fae7cd77cb74   wordpress                  "docker-entrypoint.s…"   9 minutes ago        Up 9 minutes        80/tcp                                                                                                              wordpress
bd89482e0c69   mysql                      "docker-entrypoint.s…"   37 minutes ago       Up 37 minutes       3306/tcp, 33060/tcp                                                                                                 mysql
[root@blog nginx_proxy]#
可以看到,以上容器都启动完成了
-
后续配置
提前将域名解析到服务器IP,打开nginx-proxy-manager的管理界面登录https://999.gd.cn:45678

默认登录信息:
Email:admin@example.com
Password:changeme
进入后根据提示修改一下管理账号密码,退出当前账号,再重新使用新的管理账号密码登录。
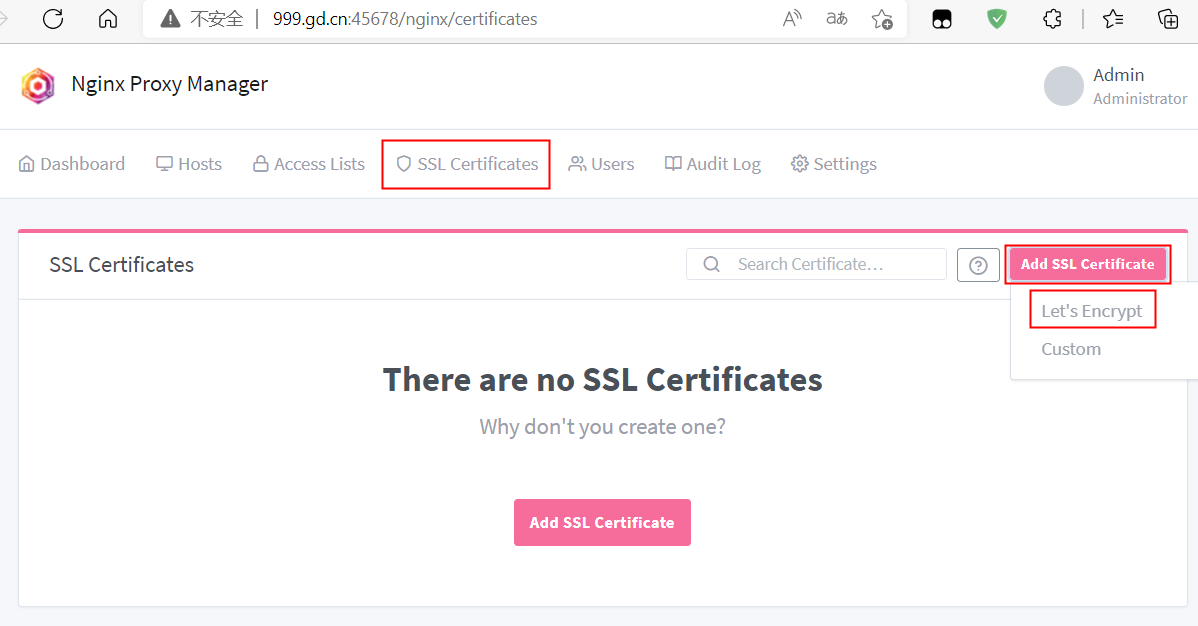
到SSL Certificates页面申请SSL证书
SSL Certificates—-Add SSL Certificates—-Let’s Encrypt
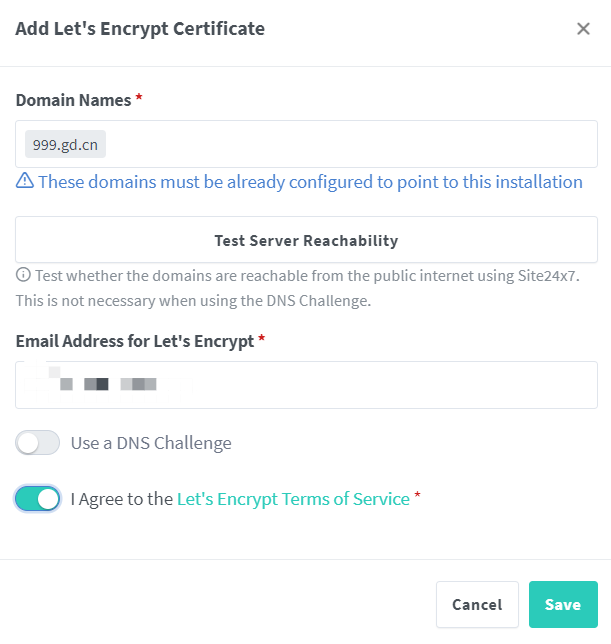
填写域名,同意协议
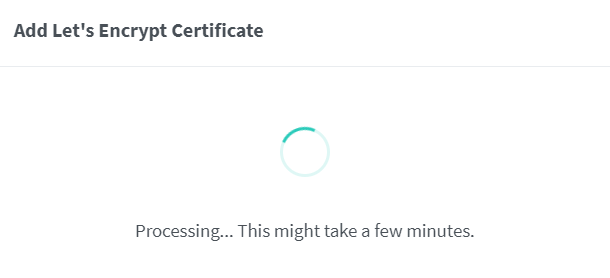
稍等一下
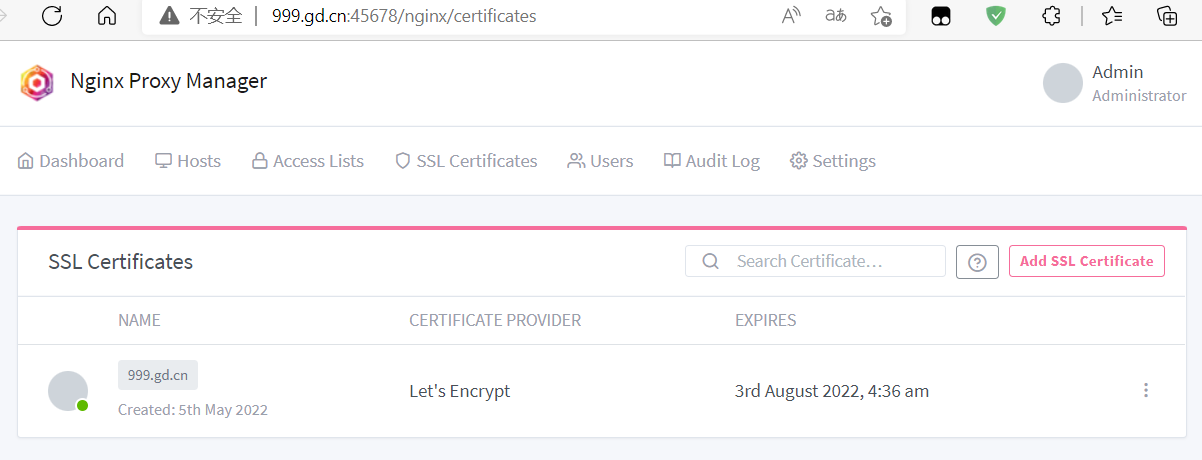
申请好了
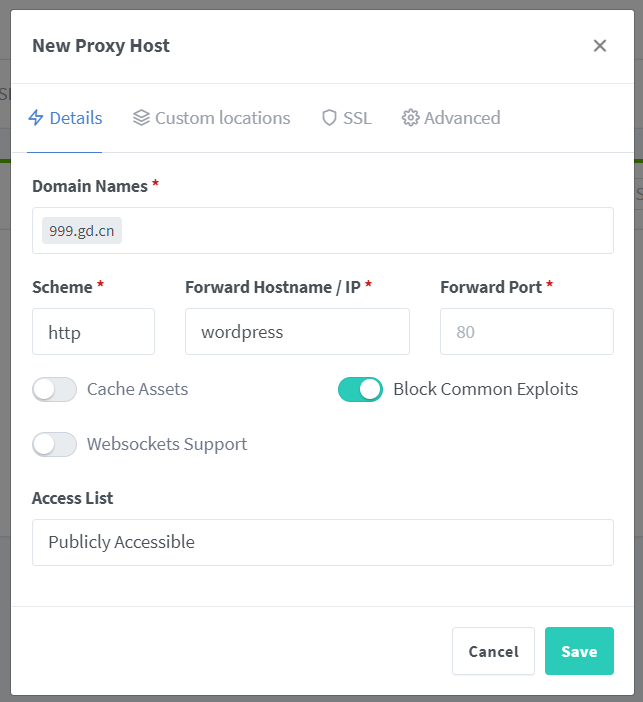
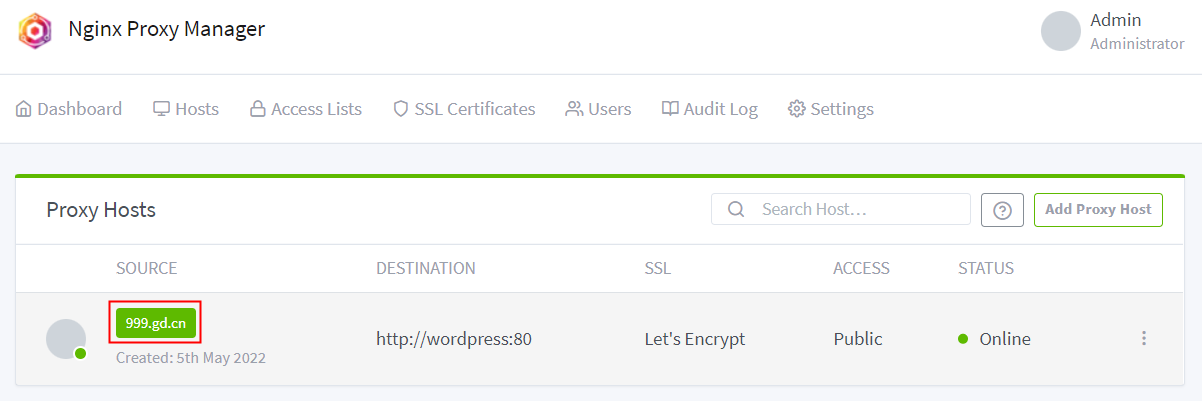
回到Hosts > Proxy Hosts > Add Proxy Host
填写域名,IP填镜像名(容器名):wordpress,Port输入80,勾选block common exploits
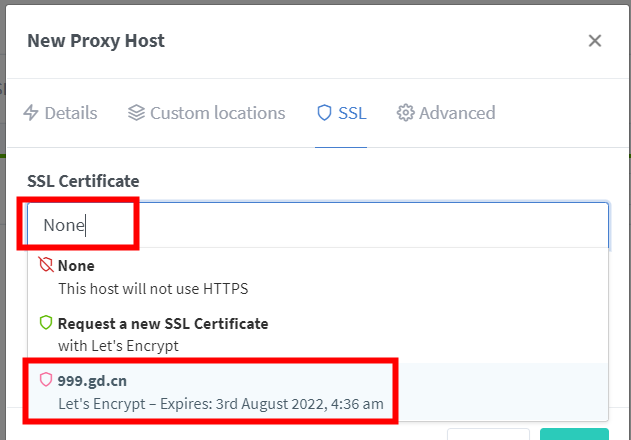
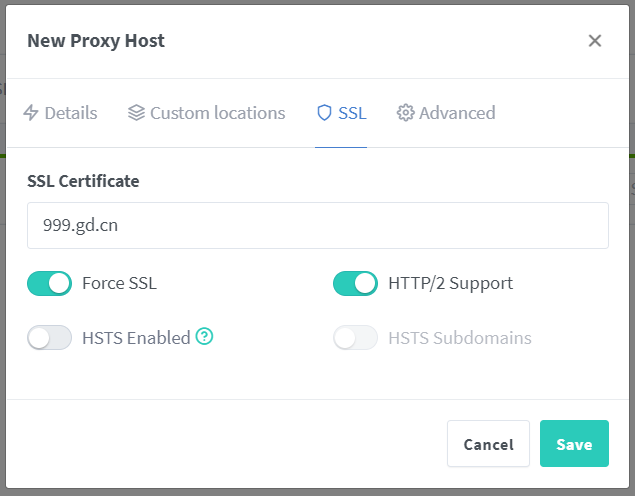
切换到SSL页签,证书名称选择刚才申请的域名
勾选Force SSL和HTTP/2 Support
提示Online了
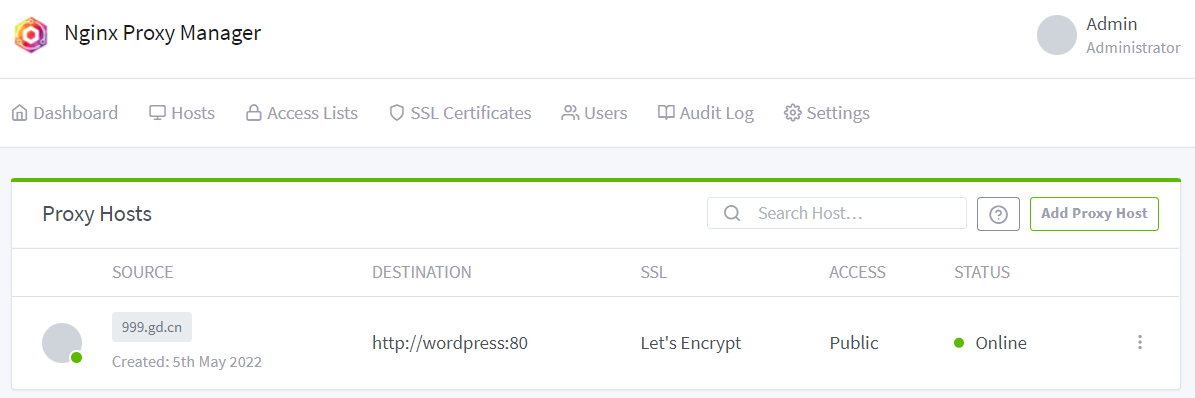
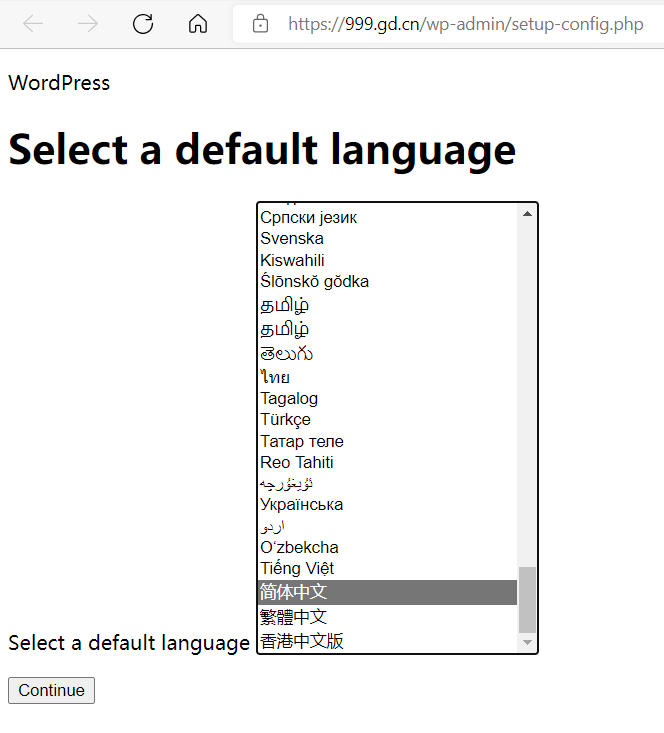
鼠标直接点击域名
会打开WordPress的安装界面,但是这里就出现了CSS/JS丢失的情况,暂时先不管,直接安装即可。
选择中文,继续
现在就开始。
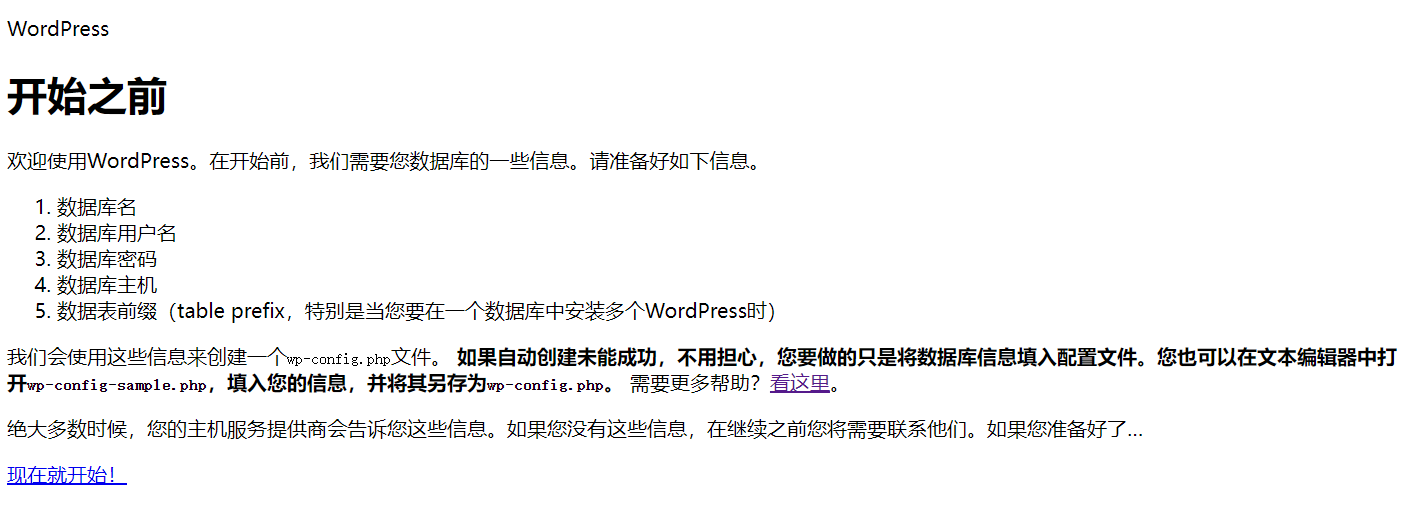
填写刚才的数据库信息

可以连接成功。运行安装程序

填写一下站点标题、管理员信息及邮箱地址。
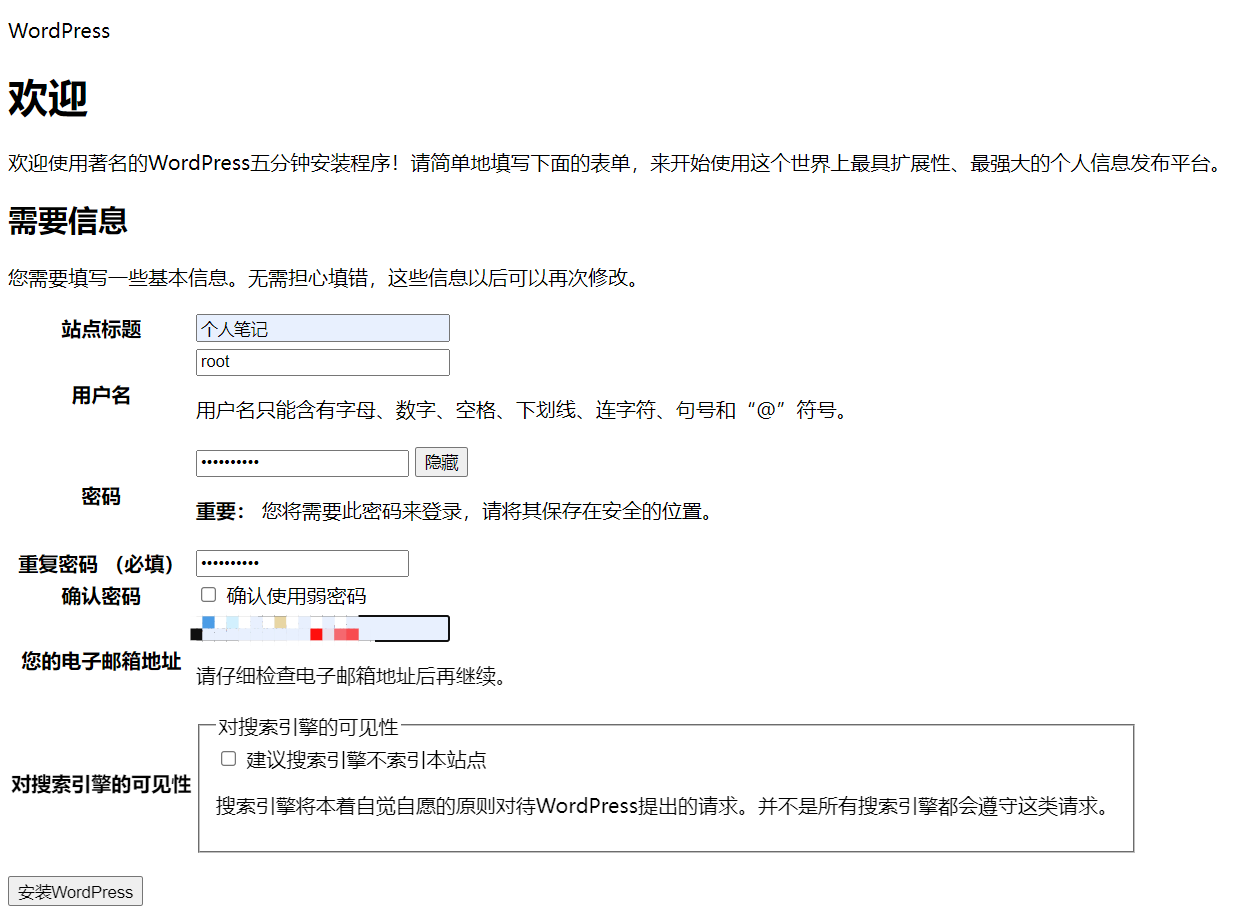
成功

可以先不登录。
-
css/js丢失的问题问题解决
回到ssh,最后解决一下css/js丢失的问题
进入/wordpress目录,编辑wp-config.php文件
cd /wordpress
ls
vim wp-config.php
在// Database settings – You can get this info from your web host //后面插入以下内容
/**强制使用SSL/HTTPS访问后台以及登录**/
define('FORCE_SSL_ADMIN', true);
define('FORCE_SSL_LOGIN', true);

/**请求标头告知**/
if (isset($_SERVER['HTTP_X_FORWARDED_PROTO'])
  && $_SERVER['HTTP_X_FORWARDED_PROTO'] === 'https') {
  $_SERVER['HTTPS'] = 'on';
}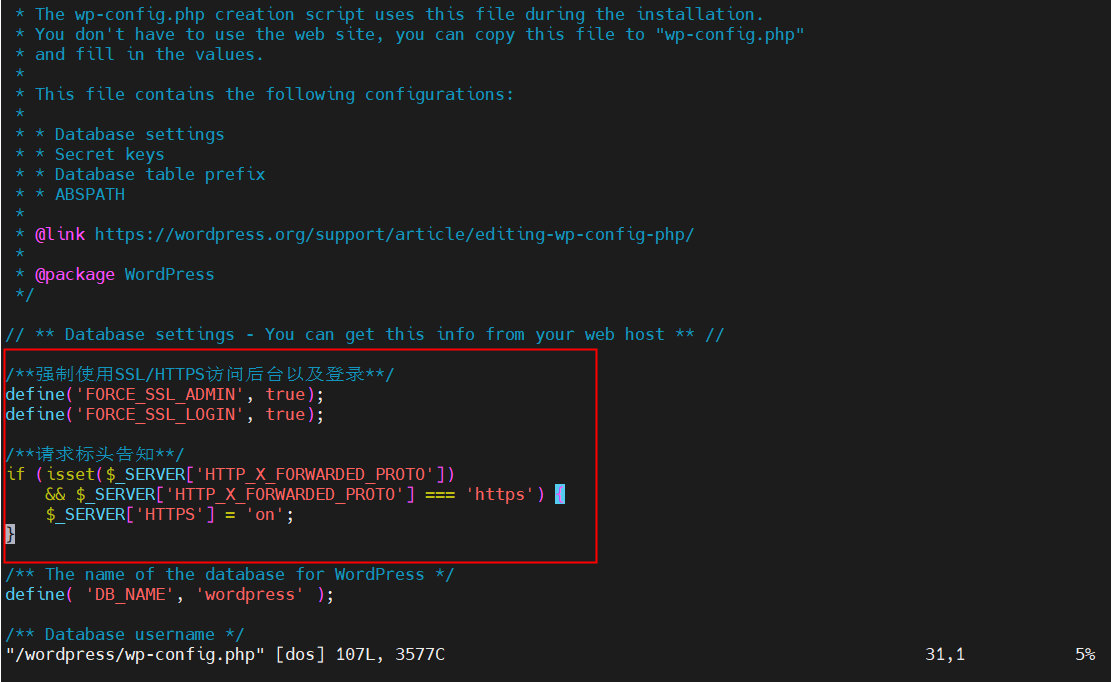
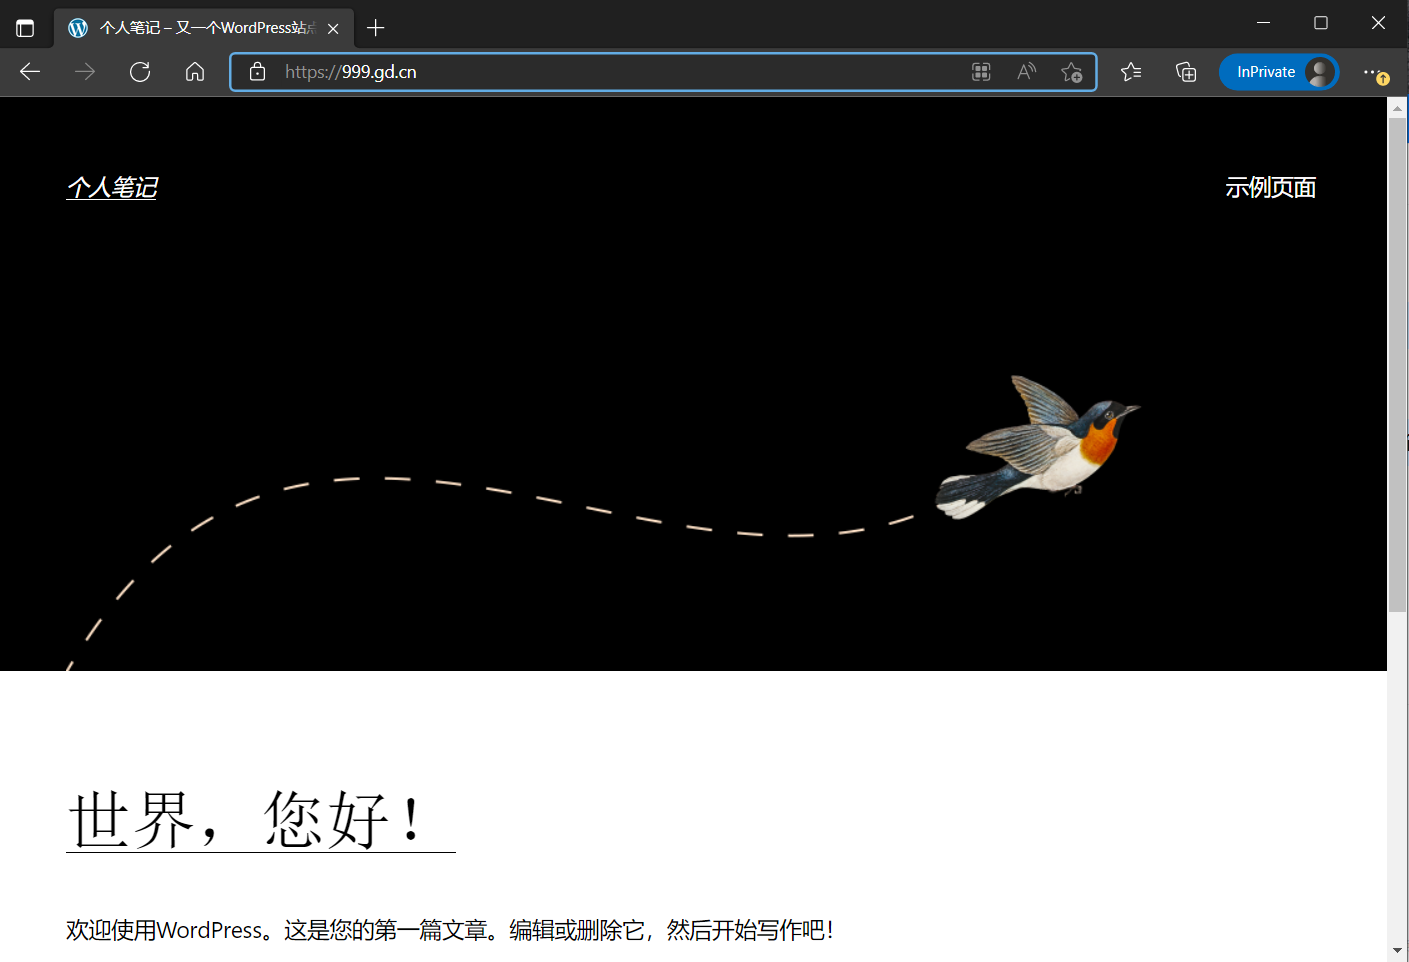
刷新网页 css/js不再丢失,正常了。
打开网站,效果如下:
《“Docker部署WordPress,并开启SSL”》 有 1 条评论
What a information of un-ambiguity and preserveness of preciouus
know-how concerning unpredicted emotions.